Tuesday, March 6, 2018

My persional Tarot Journal

Well I started learning hoe to read Tarot cards two months ago.
 As I was learning I wanted a PDF of the book my deck came with.
So I was looking for a site I didn't have to sign up on in order to
download the book. The cards I got was The Steampunk Tarot
By Barbra Moor illustrated by Allie Fell. As I was searching
I came across a podcast on the Biddy Tarot Site featuring
Barbra Moor. Biddy Tarot Podcast 47 Tarot made easy
with Barbra Moore. And as I went through the site I learned
about a Tarot Journal, I didn't have one and I didn't want to
get a cheep one or even a fancy expensive one. It came
to mind I have the stuff to make one and it would be more
personalized, a more connection with the journal. So
I took a romaine box cut it out bent it to shape, then I
mod podge blank paper to the cardboard. I then used distressed
ink by Tim Holtz, I used lavender and piled pain witch
piled paint is a green color. I added a label to the front and labeled
it Tarot Journal. I put another label on the inside with my name,
so that it is customized to me and my energies. then I coated it
with two coats of mod podge. Then I cut and sized the blank paper
for the journal. Then I glued the paper in with a red ribbon as a book mark
with spray mount and mod podge, at the top and bottom of the inner spine
agents the paper. I glued a white and purple string in place with E600, to help it look
more finished.
This is the front of the journal.
This is the back or the journal the back
inside looks pretty much the same.

Here is the inside front of the Journal
with the label with my name on it.
I got the free labels at


my steampunk jewlery box

Ok I started out with an Apple Spice box. My mom gets food
catered at her work and if there is any extra she gets to take
it home. So that's where I got the box from, then I covered the
box in white gesso.

 
Then I put rails on the inside for a removable tray

The rails are two strips layered on each side and the tray
and rails are cut from a romaine box.

 
Then I used hot slue to fill in any spots that needed
it and smoothed it out. Then I used spry mount to adhere the
printed out images I got online. The gesso helped keep
the images brighter. I also put blank peace's of paper
on the spots that I didn't have an image for. I covered
the white paper with distressed ink by Tim Holts The
main color I used is violet and also on the purple edges
of the image to make it look older and distressed and used.
The second color I used is a green called pilled paint, I
also used it on the raised edges on the green to make it
look distressed and old and used.


And as you can see I added a label on the front
of the lid to personalize it for my self. Here is
where I got the free labels from.

then I covered the whole outside of the box and inside
with mod podge to seal it and keep it protected with use.
And as you can see I labeled it with my name so its
personalized to me and shows that its mine.


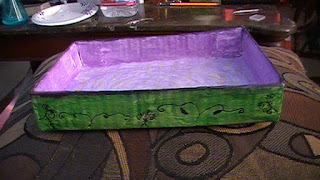
And the tray I used the mod podge to adhere the paper
to the tray.  I used markers on the inside to get that light purple
color and yellow water colors for he stars. the to edges rim
I used red and blue markers to create the dark purple color.
and painted the sides and bottom with water colors as well.
The images on the sides of the tray I used a fine tip sharpie.
And finally I mod podge the whole thing with two coats
to protect it from use. I also used the distressed ink on the tray.


I was board so I painted a simple flower on the
bottom of the removable tray.

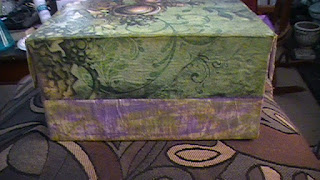
And this is what the front of the tray looks like with the
tray is inserted in the rest of the box siting on the rails.