Thursday, January 4, 2018

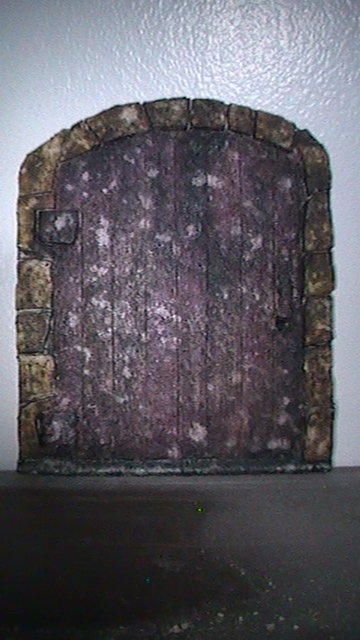
Old purple steampunk fairy door

Ok this is the fairy door I made, Its about 7 inches tall judging by
a fairy being 6 inches tall. I wanted to make an old steampunk
door and I wanted it to be purple as well. I made it out of an old
Styrofoam take out container, I cut out the peace's for the stone
work and glued it on with hot glue and the hinges and door
handle as well. I colored it with water colors be dry brushing it
on. And I made it look like wooden slats and hinges by using an eye
pin to indent the lines. And I also used an old hard bristle hair brush
to make it look more like its wooden, by scraping it across it. Then
after I painted it I used an old container of sculpey glaze that dried
out, I broke up the dry bits and I added water to it. Then I carefully
added it to the door making sure not to let the paint run at all, I
put it out side in the summer sum to let it dry. After it fully dried I
placed it upon the fire place mantel.


This is what it looks like in normal lighting. 

Friday, September 29, 2017

My Steampunk lesbian self filigree ring

This is the newest peace of jewelry I have made. I was thinking of how I could show I'm a single lesbian with out saying anything, Because I'm a feminine transgender women who is also a lesbian. So I was thinking of a laughed ring that maybe has a rainbow heart on it. But I decided not to because I couldn't find one. So I thought of the lesbian triangle to show I'm a lesbian but then again I didn't find a laughed ring with this on it ether.  I also wanted it to be a steampunk ring so while I was at Michael's in the jewelry section I seen a set of filigree rings but I didn't get them at that time. So I was on there website and found them there and some key charms I was looking for, I bought them then. So I decided on the lesbian triangle but I didn't have black polymer clay, So I mixed leaf green and red pearl. It didn't go black like I thought it would like with oil paint when you mix a certain shade of red and green it will go black. But I wanted it to match the filigree ring and the polymer clay went a reddish brown and it sparkles in the light. So I made the triangle anyways and after I baked the clay I glued it on with E6000. And the next morning I started wearing the ring. It is a steampunk lesbian self filigree ring. Here is what it looks like finished.
 
So this is what it looks like from my view wearing the ring.
The white looking dots is what is sparkling in the light. The ring also represents to
be true to ones self for who they are and for me that is. No matter what happens in life how
I question things I'm still a transgender women Who is also a lesbian. To be happy and except my self as so, no matter what happens through life. So of at this post I'm still a single transgender women who is also a lesbian. So any takers?

Monday, September 18, 2017

My Steampunk head bands and jewlery I made.

I hade planed on this post a few years ago but never got around to it. SO here is my latest things I have made.


This is the first head band I have made from an old shirt and gears I have sown on,
and the Blue one is the second one I made as you can see below it is made the same way.
By sowing two peace's of fabric together to make it longer then folding it in half, and
sowing together then turning it right side out and the last end stitched in the ditch to
close the end. Then I sown the gears in place like there working gears, and theses are
the first two steampunk headbands I ever made. I may make a different kind of headband
in the future made of metal etc. to create a different steampunk look.

This next one is a butterfly pendent made out of polymer clay. The wings I made
them look like leafs. I put the same kind of chain on it like my heart pendant, so
its like a choker the top image is the front and the bottom is the back of the butterfly.

This next one is a cameo style of a rise of red flower I made this out of polymer clay as well.
I also glued on green rhinestones there plastic ones. And how I did the back was, I took a safety
pin and put it evenly in the middle and sandwiched it in between the clay before baking it. And
I could use it on the middle of the color of a elegant shirt, or as a broach or hang it on a chain
 like a neckless will work as well.

This last one I made is a cross I was thinking of making a steampunk cross
and this is what I came up with. It is also made out of polymer clay, and the wire at
the bottom of the cross. The wire is two scraps from two eye pins bent into shape
and places in the clay. And the design on the edges of the arms of the cross makes
 it look more finished, reminds me a cactus its heard to see but there lines going around
the edges of the arms. The last design the dot with the lines surrounding it reminds me of
the sun or that bright light that is explained as when you pass away and enter the light. So
this is the best I could come up with for a steampunk cross.


Thursday, September 15, 2016

Steam Girl (Demo) steam edition


This is a song I have been working on its a transgendered lesbian steampunk love song.

Wednesday, August 10, 2016

Steampunk goggles

Here is A pair of steampunk goggles I made from mason jar rings for the eye cups. and padded with the cuffs of a shirt stuffed with cotton from Aspirin bottled And sown on with beading thread rated up to 20lbs. The straps are peace's from an old pair of shoes and every thing is held in with paper clips. the eye lenses are cut out from a container cookies come in.


Saturday, August 23, 2014

Steampunk jewlery 2


 This is what I call the sands of time necklace its used to
travel through time but mostly it helps you to get back to
your own time especially if you add it to your time device
that makes you go through time like on your air ship etc.
don't know how it works but it glows slightly in the dark
especially charged by the light fore 15 seconds.

 This is the broken heart that has bean mended back together
by stiches and a belt like strap with a key hole and a gear
imprint to show the inner working of the broken heart.


This is the key to my time devise my time machine
it what I tell people some people think its the key
to my heart but it isn't.

Sunday, March 9, 2014

How To Measure For Your Bra Size


So measure under your bust if even your good this is your band size if odd go up and down a band size

to were their is only two inches of give on the back band next measure your bust under your shoulder blades and over the fullest part of your breasts your bust to were it almost falls off but tight enough were it doesn't this is your cup size the difference like mine my band is 32 and bust is 35 3'' difference that's a cup size per inch if its the same as the band its an AA 3'' difference is a C so I'm a 32C and no two C cups are the same size 23C is smaller then a 34C. Cup size is relevant to the band size like 32C is the same cup size as a 24A as shown hear are sister sizes.


The band should sit evenly around and under your shoulder blades and the gore of the bra the center front should sit on your breast bone with out gaping and should be hard to pull it away less then an 1/2'' cups should lay with out gaping even know it does gap sometimes if its the correct size it could be the shape of your breasts like mine are bottom heave more breast tissue on the bottom this can do it to band does 90% of the support and the straps do 10% of the support the straps should not be able to be lifted to your ears only less then half way and shouldn't dig into your shoulders if so loosen them if it still does check if your band and cup size are correct and if it still does with the correct size get bras with wider straps wearing the correct bras your breasts should be center of the bust nipple area half way between your shoulder and elbow not lower if so cup size is to big and if to small your breasts could fall out or look squished like their budging out of the sides or towards the center of the breasts bone hear is an example of an ill fitting bra cup and band is to big 34C and example of correct size 32C.


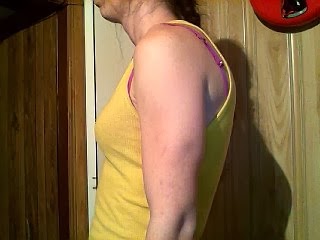
 Before wrong bra 34C top looks flatter un                 After correct bra 32C lifted rounded looks like a
supported lower and not centered in-between             cup size bigger supported centered in-between
shoulder and elbow bad posture looks smaller            shoulder and elbow good posture looks bigger
 
This is just a starting point remember band size cup size shape of your breasts so try on several styles entail you find the styles that fit your size and shape remember ill fitting bras can cause back pain shoulder pain neck pain bad posture ETC especially with larger breasts. The right fit will support breasts reduce pain improve self confidence happiness and over all look good and sexy and fit better in clothing especially if shirts are fitting tighter then they should wearing the correct size helps and remember be you every one is different size and shape be your self and strive for booby comfy are girls are are girls and we need to take care of them to.